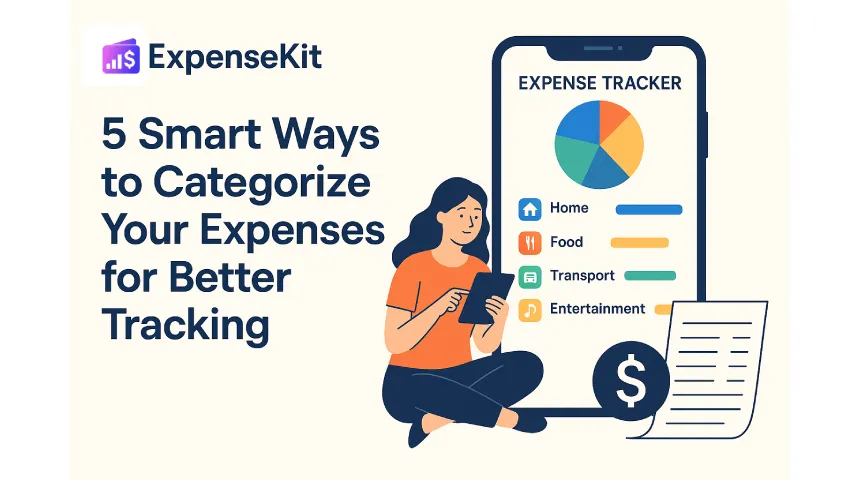
How to categorize expenses: a complete guide
To categorize expenses, list every transaction, group it by purpose, separate fixed bills from variable spending, assign clear category names, review uncategorized items weekly, and adjust budgets from totals. ExpenseKit is a personal finance app for individuals and families to track spending, set category budgets, review reports, and manage debt repayment in one place.
Key takeaways
- Expense categorization works best when every transaction has one clear purpose-based category.
- Standard expense categories make budgets easier to compare across weeks, months, and family members.
- Consistent expense categorization shows where overspending starts before it becomes debt.
Example: a $58 DoorDash order belongs under “Dining Out,” not “Groceries,” because it is restaurant spending, not household food.
Why expense categories matter
Expense categories turn a long transaction list into a budget you can use. When rent, groceries, subscriptions, debt payments, and entertainment sit in separate groups, you can see exactly which part of your money life needs attention.
Clear categories also make family budgeting easier because every person uses the same labels. Example: if one partner records a $65 Costco trip as “Groceries” and another records a $65 restaurant bill as “Dining Out,” the food budget stays accurate instead of becoming one confusing total.
According to ExpenseKit user data, people who categorize expenses consistently reduce discretionary overspending by 17%.
How to categorize expenses from scratch
-
Identify your fixed costs first. Start with expenses that repeat monthly, such as rent, mortgage, insurance, subscriptions, tuition, and utilities. Example: a $1,850 rent payment belongs under “Housing” every month.
-
Separate variable spending next. Group changing costs such as groceries, gas, dining out, shopping, medicine, and entertainment. Example: a $96 Costco grocery run belongs under “Groceries,” while a $42 movie ticket purchase belongs under “Entertainment.”
-
Create broad categories before subcategories. Use 8-12 main categories so reports stay readable. Example: Uber, subway reloads, gas, parking, and tolls all start under “Transport” before you create smaller labels.
-
Assign one category per transaction. Choose the category by spending purpose, not payment method. Example: a $74 Amazon order for diapers belongs under “Kids & Family,” not “Shopping.”
-
Review uncategorized expenses weekly. Fix unclear merchant names before memory fades. Example: “SQ *FITNESS $29” should become “Health & Fitness” if it was a gym class.
-
Set budgets after 30 days of data. Use real category totals instead of guesses, then cap overspending categories. Example: if Dining Out totals $420 in May, set the June budget at $325 and review it every Friday.
Use ExpenseKit category budgets and reports to compare planned vs actual spending. For faster setup, read ExpenseKit’s automatic expense categorization guide and connect category tracking with debt repayment planning.
Standard expense categories
| Category | What it includes | Example transactions |
|---|---|---|
| Housing | Housing includes rent, mortgage, maintenance, repairs, property tax, and home services. | $1,850 rent, $120 plumber visit |
| Utilities | Utilities includes electricity, water, gas, internet, mobile, and household service bills. | $142 electric bill, $65 internet |
| Groceries | Groceries includes food and household basics bought for home use. | $96 Costco, $38 Trader Joe’s |
| Dining Out | Dining Out includes restaurant meals, cafes, food delivery, and takeaway orders. | $58 DoorDash, $14 Starbucks |
| Transport | Transport includes fuel, public transit, taxis, parking, tolls, and vehicle upkeep. | $52 gas, $23 Uber |
| Health | Health includes doctor visits, medicine, diagnostics, fitness, and wellness costs. | $35 pharmacy, $89 urgent care |
| Insurance | Insurance includes premiums for health, vehicle, life, home, and travel coverage. | $210 health premium, $118 car insurance |
| Debt Payments | Debt Payments includes credit card payments, loan payments, interest, and repayment fees. | $300 credit card payment, $425 student loan |
| Savings & Investments | Savings & Investments includes emergency fund transfers, brokerage deposits, retirement contributions, and goal savings. | $250 Roth IRA, $100 emergency fund |
| Personal & Family | Personal & Family includes clothing, grooming, education, childcare, gifts, and family needs. | $64 haircut, $180 school supplies |
Example: a $118 GEICO charge belongs under “Insurance,” while a $118 Target grocery pickup belongs under “Groceries.”
Needs, wants, savings, and debt
A simple way to categorize expenses is to group each category into needs, wants, savings, or debt. Needs keep daily life running, wants are flexible lifestyle costs, savings build future security, and debt payments reduce balances.
Example: a $1,850 rent payment is a need, a $58 DoorDash order is a want, a $250 Roth IRA transfer is savings, and a $300 card payment is debt. This structure helps you cut spending without accidentally cutting essentials.
The 50/30/20 budget works with this structure: 50% of income for needs, 30% for wants, and 20% for savings plus extra debt payoff. ExpenseKit lets you track both categories and budgets, so a “Dining Out” category can sit inside a wider “Wants” plan.
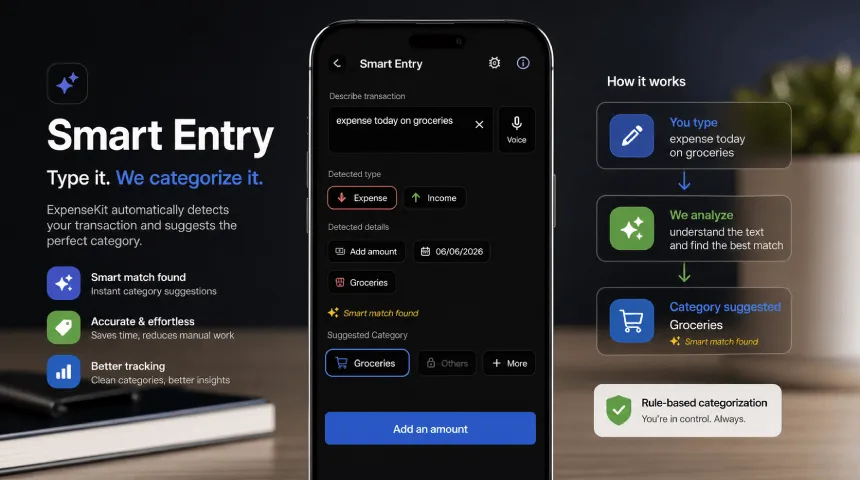
Manual vs automatic categorization
Manual categorization gives full control because you choose each category yourself. Automatic categorization saves time by sorting repeat merchant names, notes, or descriptions into the same category.
Example: if “STARBUCKS” appears every weekday, an automatic rule can place it under “Dining Out.” If “Amazon” includes groceries, school supplies, and electronics, manual review keeps those purchases accurate.
Start manually for 30 days, then automate repeat transactions. Read the automatic expense categorization guide after your core categories are clean.
Common mistakes to avoid
Avoid using “Miscellaneous” as a catch-all category. It hides budget leaks and blocks useful reporting. Example: a $39 app subscription, $22 impulse purchase, and $47 restaurant bill need separate categories.
Avoid mixing groceries with food delivery. Groceries are home food; delivery is convenience spending. Example: a $72 Walmart grocery order belongs under “Groceries,” while a $72 Uber Eats order belongs under “Dining Out.”
Avoid categorizing by card name only. Payment method shows how money moved, not why it moved. Example: one Chase card can pay rent, prescriptions, Netflix, and gas.
Avoid creating too many categories on day one. Too much detail makes tracking harder. Example: start with “Transport” before splitting it into “Gas,” “Parking,” “Transit,” and “Ride-share.”
How ExpenseKit helps
ExpenseKit lets individuals and families create custom categories, set category budgets, track debt payments, and view spending reports in one place. Example: a household can track “Rent,” “Groceries,” “Dining Out,” and “Car Loan” separately instead of guessing from one monthly total.
ExpenseKit also supports reports and exports for monthly review. Example: exporting May expenses shows whether a $650 budget overrun came from travel, shopping, medical costs, or restaurants.
For debt-focused budgets, connect expense categories with payment goals in ExpenseKit. Example: if “Dining Out” drops from $420 to $325, the extra $95 can move to a credit card payoff category; use the debt repayment strategies guide to choose a payoff method.
FAQ
How to categorise expenses?
To categorise expenses, group each transaction by spending purpose. Use categories such as Housing, Groceries, Dining Out, Transport, Health, Debt Payments, and Savings. Example: a $23 Uber ride belongs under “Transport,” while a $23 Taco Bell order belongs under “Dining Out.” This UK spelling means the same thing as “categorize expenses.”
What is expense categorisation?
Expense categorisation is assigning each transaction to a clear spending category. It turns raw payments into useful budget data for reports, limits, and family money decisions. Example: “Amazon $49” becomes “Electronics” if it was headphones, but “Kids & Family” if it was school supplies.
What are the main expense categories?
Main expense categories are Housing, Utilities, Groceries, Dining Out, Transport, Health, Insurance, Debt Payments, Savings & Investments, and Personal & Family. These cover most personal budgets without making tracking complicated. Example: a GEICO premium belongs under “Insurance,” while a Vanguard transfer belongs under “Savings & Investments.”
How often should I categorize expenses?
You should categorize expenses weekly for accurate tracking. Weekly review keeps merchant details fresh and prevents uncategorized backlog. Example: reviewing every Sunday helps you remember whether “SQ *FITNESS $29” was a class, subscription, or medical payment before it becomes unclear.
What are the best categories for expense tracking?
The best categories for expense tracking are broad enough for clean reports and specific enough for action. Start with 10 core categories, then add custom categories for your life. Example: parents can add “Childcare” for a $900 daycare payment while keeping clothes under “Personal & Family.”
How to categorize personal expenses?
To categorize personal expenses, separate needs, lifestyle spending, savings, and debt payments. Assign each transaction to one category based on purpose. Example: $110 Nike running shoes belong under “Health & Fitness” if bought for exercise, not “Shopping,” because the purpose is wellness.